How to Draw Peacock Feathers With Colored Pencils
Hello all, welcome back to another of my pastel pencil tutorials, I hope you're enjoying them so far! Thank you so much to everyone who has emailed in and contributed to the online community over on facebook: 'Emily Rose Fine Art Drawing Class', you can join it here. I'm giving out feedback on the group and it's wonderful to see people's progress with the previous tutorials.
The last post was all about drawing and I showed you how to transfer a Peacock onto pastelmat. Well, unsurprisingly, this week is about rendering said Peacock in all of his blue and turquoise glory. They make great subjects, but take your time, enjoy it and don't rush. You can achieve amazing results with this tutorial, no matter your age or ability but take your time with it.
I have tried to do this tutorial in a slightly different manner; alongside the usual written steps and photos, there are now some video clips of me drawing that stage. I would love to get your feedback on this for future tutorials. Obviously, I am no Spielberg though, and cannot deny, I am simply thrilled I've managed to film my hand and not the opposite wall…
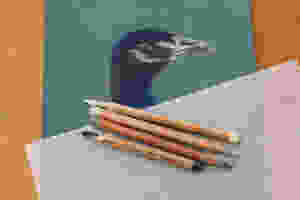
Materials List
You'll need some new colours for this tutorial and once again Paper Story Art Supplies are coming to the rescue and have provided all of the colours you need in one place. I am not sponsored by any of the products mentioned, these are just what I like to use and where I usually get them from. You can also top-up on the odd pencil if that's all you require, find the pencils here.
Pencils:
Faber Castell 177 – Walnut Brown
Faber Castell 181 – Dark Grey
Faber Castell 199 – Black
Faber Castell 273 – Warm Grey
Faber Castell 230 – Cool Light Grey
Faber Castell 101 – White
Faber Castell 151 – Helioblue – Reddish
Faber Castell 102 – Ivory
Faber Castell 155 – Helio Turquoise
Faber Castell 156 – Colbalt Green
Faber Castell 143 – Colbalt Blue
Faber Castell 140 – Light Ultramarine
Faber Castell 170 – May Green (or use the Derwent May Green)
Faber Castell 173 – Olive Green
I used the Clairefontaine Deep Green Pastelmat paper for this, you could use another colour but I would keep it dark for this palette. You can find paper packs here.
Step 1 – The Eye
Assuming you have your reference photo transferred onto the pastelmat using my previous tutorial here, you'll be itching to get those jewel-like colours down, but, they don't come in for a while. We start with the eye, it's the best place to start for most paintings, as I explain in the video. The eye on my reference was very dark and simple, I would keep yours likewise or we risk losing the emphasis on his amazing colours.
Below is the video and after that a step by step written breakdown of everything I do. I am narrating the video and showing which pencils I use, but if I go too quickly just read the steps to catch back up.
1) Start by taking the FC 177, brown, and colour in the iris, making sure that most of the card is covered and the green not peeking through.
2) Around this, we are going to add the FC 181, dark grey, and outline the iris, then take it down to the tear duct so that the inner edge of the eye is defined. You'll need a fairly sharp pencil to do this with, but, you also want to allow the dark grey to melt into the brown, you don't want a hard edge or a bit of the green card showing through.
3) While you're here, use the 181 to outline the pupil, again this should 'melt' into the brown iris and will stop the pupil jumping out at us.
4) Next, simply fill in the dark pupil with FC 199, black. I left the highlight as the green card for now, so that it will be bright and clean when we draw it in later, so don't colour it in with the black. Because I filmed this, the stages are grouped together a little more closely and there are fewer photos this week, so the eye below is the finished eye but you can look at it to help you along, or pause the video.
5) For the highlight, colour the whole thing in with the FC 273, mid grey, and once again make sure the grey softly blends into the black pupil around it.
6) Over the top of the FC 273, mid grey, add a brighter mark using the FC 230, light grey.
7) Finish the highlight, (three steps for a small space seems ridiculous, I know, but it is worth it!), with the FC 101, white. Make the white mark the smallest of all the marks; it is the tiniest pinprick of bright light.
8) Thought the eye was finished? Think again! You are almost there, though, and these details make for a cracking start to a superb painting so stick with me. Outline the eye with the FC 181, dark grey. This should be a fairly thick line, it is the eyelids and they look like a gothic eye-liner.
9) Depnding upon your reference photo, add some darker shadows to the lids with the FC 199, black. I added some dark shadows under the bottom and top lid, it helped to put the eye into a socket and give more dimension.
10) To finish, (to finish step 1…), use the FC 273, mid grey, to add a few small highlights to the lids of the eye which will really round out the form. You should be left with something similar to below.

Peacock Drawing Tutorial Step 1
Step 2 – Underpainting
Okay, I'll admit, step one was a little on the long side, but don't worry, the rest are not quite so long! More to the point, we get to start adding a little colour which is exciting. As the video explains, an underpainting is very important to your finished work; it brings structure and volume to the form of your animal. So, unless you want your Peacock to have a few holes in him, you better do this step with as much love and care as the previous, even though you won't see much of it by the end.
1) Take the FC 181, dark grey, and if it isn't sharp after the last step don't worry about it, you won't be needing that edge for this. Hold your pencil on the side, so that the edge of the pastel lays flat to the page. The reason for this is that it gives a much softer and even coverage which is what we need for the underpainting. Decide where your shadows are in the reference and shade them in with the FC 181.
2) In the video, I didn't do this next part, I added this step later on when I realised my underpainting hadn't gone quite dark enough – oops! So, decide where your absolute darkest shadows are on the Peacock and gently add these in with the FC 199, black. You want to be shading over the top of the FC 181, dark grey, so that they blend together softly and the black doesn't jump out.
3) To finish off the underpainting, use the FC 151, royal blue, to glaze over the previous steps, (this will tint them blue but should not obliterate the darkness so don't press hard), and colour in the remaining paper. You need to keep using the pencil on its side for that soft, even application and follow the direction of the feathers as you go.

Peacock Portrait Drawing Tutorial Step 2
Step 3 – Beak Underpainting
Before we get onto the really fun stuff, let us get the beak and face sorted out. It's quite simple; there's a method for drawing in both the beak and the white skin on his face, so you can practice it as you go!
1)Start by colouring in all of the white patches on his face and the whole of his beak with the FC 273, mid grey, (I usually do one half of the beak at a time so that it stays the correct shape but it is up to you).

Peacock Portrait Drawing Tutorial Step 3
2) Over this mid-grey, pick out the shadows and draw them in with the FC 181, dark grey. These areas are the nostril, dark pattern on the beak and shadows under the eyes. I also softened the mid-grey edges with the same FC 181 pencil at this stage. Because our underpainting is dark, and has a lot of FC 181 in it, glazing over the mid-grey edges allowed them to melt into the underpainting on his cheeks and forehead.
3) For the nostril, you'll need to take it a touch darker with the FC 199, black.

Peacock Portrait Drawing Tutorial Step 3
4) To finish these areas off, it is again the same process. Begin with the FC 230, light grey, and gently pick out the highlights on his beak, jowls and brow. For his jowls and brow, these marks can be a little more random to suggest texture, whereas, for his beak it can stay smooth.
5) Over the top of some of the light grey, I finished with a little FC 102, ivory, which is a warm light. This warm bounces off the cooler pastel of the light grey really nicely and helps to add roundness.

Peacock Portrait Drawing Tutorial Step 3
Step 4 – Teal Plumage
Before you can pick up that beautiful teal colour, shade over any dark areas which have a greenish feather ontop using the FC 173. I only had a small area which needed this and it is a glaze, don't press hard. If you don't have this pencil, just carry on!
Now, it is finally time to pick up the first of out 'pretty colours'. I rather fell in love with this colour and you'll see why when you begin! On my reference photo, there are a fair amount of teal and turquoise feathers around his face and upper neck
Start placing these in with the FC 155, you need to keep referring to your photo to check which way the feathers are laying. Allow the dark underpainting to show between the feathers, this will give you depth.
For the small fathers on his face, you are better off 'scumbling' the pencil over the top of your underpainting, so that it catches here and there and creates a textured effect. In the video, I show you that I achieve this by 'swirling' the pencil, in a very, very tight motion, over the page and press it up and down so that the marks vary in pressure. It creates a slightly random but pleasing pattern and can be trailed in rows like the feathers.
You will find a motion which works for you, it's worth having a practise on some scrap if you feel unsure of yourself.
Remember, this teal is only intended for the green/blue plumage and not the royal blue elsewhere. We will also be going over this with a lighter colour later on.

Peacock Portrait Drawing Tutorial Step 4
Step 5 – Blue Plumage
Logically, we move next onto the royal blue feathers; these are equally beautiful and must also be marked in with a dark colour before we later add the brighter iridescence on top.
It was at this point in the videos that I added in some black to my shadows before going over with the blue as mine weren't dark enough. If you too are unsure of your shadows, now is the time to fix them!
Use the FC 151, royal blue, to begin marking the feathers which you can see on your photo. You'll notice, that the feathers which are around his eyes, appear to be more widely spaced out and you need to allow the underpainting to show between your blue marks in order to create this effect.
The feathers on top of his head, appear to be one mass of blue: they are foreshortened and we cannot see down into the dark feather below. You should mirror this in your work and it will help to bring both dimension and light to the painting.
I think that is half of the art of drawing: seeing. The study of your subject, then stop, study some more and then make your mark when you understand what it is you're looking at and what it is that way.
The photo has been heavily edited so that the blue markings show up against the underpainting a little better for you. Because the underpainting and the blue are almost the same tones, (how light or dark something is), it is very hard to distinguish between them and almost impossible in a photo. Yours should look much more subtle and beautiful in person!


Step 6 – Teal Highlights
We are positively racing ahead now, it really pays to give time to those apparently boring stages are the start so that you can have fun with the brighter colours now.
We are going to work back into the teal/turquoise areas with the FC 156, light turquoise so that the light appears to catch each feather.
This lighter colour, should be used in a similar motion to the first layer of turquoise, but, don't colour in all of the board. We still need to allow the two previous layers to show through and give us dimension, from dark tone to mid-tone, to lightest.
In the video, you see me again making sure that the feather marks are laying in the correct direction and this is key to success with any fur or feather that you draw!

Peacock Portrait Drawing Tutorial Step 6
Step 7 – Light Blue
This next step really sees your Peacock jump out of the page, he comes to life! The technique is much the same as the previous step until you reach the neck, as I explain in a video below, (sorry these are not compiled together, the files became too large for the blog post to manage).
So, begin with the head and the FC 143, mid blue, to add more highlights but to the blue areas this time. You may want to mix a little of the blue into the turquoise and visa versa.
Here's a time-lapse of me finishing this area off…
When you reach his neck, you may see that the feathers are a bit longer, more like fur. For this, you'll want to 'brush' your pencil very gently across the page and make sure the start and finish of the strokes are off of the page. If you begin with the pencil already pressed into the paper, you will end up with little 'blobs' all over you lovely drawing. By moving the pencil in an arc shape and starting with it off of the paper, you can avoid this. I explain what I mean in the video.
It may sound like a lot of faffing for nothing, but, these little changes will really progress your work and are worth practising.
You'll also want to consider, (as if you weren't already thinking about enough), that each feather is slightly curved and they all flow gently and smoothly down his neck. Hence, you need to pay attention to the direction that you draw in. Stop and study the direction, curve and length before you begin, I find a coffee break at this stage is always a good call!

Step 8 – Green Details
Isn't he looking just gorgeous? You should be proud of yourself and take that tea break if your eyes need it; drawing with such focus is hard work!
Remember that dark green colour we used way back in step 6? We are going to add a little more green to that area now, but, use the much brighter FC 170, light green. If you have the pencils from the Magnolia tutorial, you could use the Derwent pastel 'May Green' for this too.
It is the same gig again – practice makes perfect after all – making small and delicate marks to create sparkling highlights on his plumage. I wouldn't add too many green markings in, and if you think they are too pronounced, use a clean finger to quite literally tap them back.

Step 9 – Highlights
I hope you're all still with me, I know my posts tend to be on the long side, but, why do something if you aren't going to do it properly? These posts are very similar in layout to my art workshops which I would usually be hosting in Norfolk and the Buckingham/Oxfordshire area. However, with the lockdown, I wanted to keep them going, as best as I can, so that my students carry on with their beautiful work. This is why I started the facebook community for you. It isn't quite the same as drawing and chatting over a coffee and cake, but, it goes some way to fill the gap and I'm giving out feedback on your work, join it here.
Ok, back to the task in hand…
We are now adding in a new blue, FC 140, light blue. This needs to be carefully added to the lightest blue areas. As this colour is not very high in pigment and can appear a bit washed out, I would restrict this to just the blue areas, not the teal.
You can also go back in with the light turquoise, FC 156, to add a little more pigment and boost those areas up. If you add this FC 156 on top of some of the previous step, (the light green FC 170), it becomes super bright and it a great way to add more light in! Have fun experimenting with this colour.

Step 10 – The 'Fascinator'
Let's be honest, this is the best part of a Peacock: the flamboyant feather arrangements. I did consider doing a study of a tail feather, but then thought: why not do the whole head? It's more fun and less restricting!
There are multiple steps to get this stage complete, but it should be relatively simple to follow…she says…
1) To begin, we are going to draw the 'stalks' of each father with the FC 273, mid-grey. You don't need your pencil to be razor-sharp, a slightly blunt and softened end is a good thing and prevents thin lines which wobble. I would practice your strokes on scrap first as the most important aspect of drawing them is a swift and confident mark. If you dilly-dally and doubt yourself, you'll end up with stilted, awkward and rigid lines which are best avoided. Do not worry about perfection: keep the lines flowing, gentle and, most importantly, following the general direction you see on your reference. They should fan out of the head.
2) Once you have a collection of grey lines, we will add a little light to them with the FC 230, light grey, followed by the FC 102, ivory. See where the light is catching these stalks and lightly add in some brighter lines. For my reference, the light was catching the topmost feathers and so it was here that I added in some light grey and ivory streaks.
3)For the fen-like feathers coming out, I began with the FC 199, black. I used the pencil on the side, (you could also use a blunted pencil), and massed the shapes into one line. Watch the video to see what I mean. I focused on making the shapes fan out: a small triangle which joins to a grey stalk and then fans outwards and joins into another black 'triangle' next to it.
4) To soften these edges and join them better to the stalks – there must be a real word for them – I scumbled around the black edges with the FC 181, dark grey. I used the dark grey very lightly and if you work in small circular shapes, you can blend the edges out softly.

5) To start adding that electric blue, I grew the size of each fanning feather with the FC 151, royal blue. I added the blue to the top of each black shape and then brushed the pencil off of the page to achieve a soft and feathery finish.
6) Lastly, much like the head, we get to add those really exciting colours! Use a mix of the FC 143, mid blue, FC 140, light blue and the FC 156, light turquoise to add in the highlights. You can decide how much of each you want to add, it will depend upon how blue/turquoise your Peacock is looking so that they match the rest of the plumage. I would refrain from adding too much of any, though, so that these feathers don't become focal and distract entirely. Keep the lighter colours to the highlights and allow the darker royal blue and black to add drama and shadow.

And that's a wrap! Thank you all, so much, for staying with me and completing your Peacocks with this online tutorial. I hope you've enjoyed it and if you'd like to support this blog, it's really easy; just share it via social media and tell your friends, review me on Google, or, leave me a comment below. I love making these posts and sending them out but they do take time, so if you can support the blog in any way I would greatly appreciate it!
Lastly, a big thanks to Angie at Paper Story Art Supplies for giving us all such a wonderful discount on these artist-quality supplies and thank you to my partner, Will; who has gallantly put up with my huffing and puffing when I couldn't figure out the tech…which is most of the time…
See you all in a few weeks and don't forget to share your work with me on the Facebook group xx
How to Draw Peacock Feathers With Colored Pencils
Source: http://www.emilyrosefineart.co.uk/pastel-pencil-tutorial/learn-to-draw-a-beautiful-peacock-portrait/
0 Response to "How to Draw Peacock Feathers With Colored Pencils"
Post a Comment